After the serendipity of finding CHDK, I set to work on my projects. This is how they turned out.
Grid overlay. Easy, almost trivial to implement, but it’s a great help just having a couple of lines on the screen to check that your horizontal is what you think it is.
RAW shots. Difficult call here, but, yes, RAW shots can be taken; they require some postprocessing to get them to work; bad pixels can be removed automatically. The solvable problems lay in calculating a set of debarrelling constants for them. The almost unsolvable problem is that most programs do not treat CHDK’s implementation of the DNG 1.3 standard correctly. There is a tricky workaround, so that the default mode is to use the older 1.1 standard.
Time lapse. This works wonders. Just having the camera shooting very long sequences is a marvel on its own; controlling the timing is fabulous. Variations on time lapse include: Battery testing, where one shot per minute is taken until the camera packs in; exposure bracketing time lapse; and light/dark and start/stop control with a midnight-safe uBASIC script. The possibilities are almost endless.

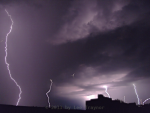
Thunderbolt and Lightning. Composite of several lightning strikes taken with the help of CHDK’s motion detection.
Motion detection lightning and meteor photography. This is a real gem. By comparing the current scene with what is stored in the image sensor buffer, an algorithm will tell if the difference between the two is enough to fire a shot. I developed a series of films at different frame rates per second to test how fast the camera was at detecting the change from a blank frame to one containing a sequence of letters (and thus by seeing which letter was captured, the reaction time could be derived). This gave a result of about 100 ms, which is certainly much faster than I can normally react. Lightning is not too common around these parts, but I did succeed on several occasions in deploying the camera for lightning strikes. I am still waiting for clear skies and a meteor shower for the meteor shots.
Auto exposure bracketing. Ok, this is what I got CHDK for to begin with, so did it work? Resoundingly, yes. The bracketing function is part of the CHDK main menu and requires no further scripting. In the normal Canon mode, select the Self-Timer for the delay and the number of shots; in CHDK mode select the exposure bias difference and the exposure bias sequence (“±” for 0, +1,-1, +2, -2 etc, “–” for starting in the negative and becoming more overexposed with time). How far could I over-/underexpose? I found the best results with steps of 1 EV and the best sequence was to start with under- and work through all steps to overexposed, with seven shots in all. These shots then require automated postprocessing, but the results are much better than a single shot and well worth the effort.
So, what do I do for CHDK? I look over their wiki every now and then and tidy up the language. It’s a small price to pay and it makes the software easier to use and understand when the language is right.
